
Project | Homemade Hair Pomade
When it comes to personal grooming I'm not a big "product" guy. I'll pretty much use the soap we have, the shampoo that is already in the shower, and whatever toothpaste is on the counter. But lately I've been noticing that my hair has been getting out of control. Well, more out of control than normal. I am both blessed and cursed with a very thick head of hair thanks to my Irish ancestry. As such, whenever we get a bit of humidity (did I mention we live in Florida - the humidty capital of the world?) my hair begins to curl and puff up to a point that even a no-frills guy like me begins to feel a bit unkempt. What to do?
Someone suggested I might want to try an old school pomade to keep my hair a bit more under control. "Great," I said. And then, "What's pomade?" Simply put, pomade is essentially some wax blended with some grease. Its purpose is to keep the hair semi-wet and thus more under control. Sounds like what the (hair) doctor ordered. Let's go buy some!
Ouch! Clearly wax and grease isn't as cheap as I assumed it would be. I found prices ranging anywhere from between $4.00 and $25.00 for what I assumed to be nearly the same product. And for not much product per jar, either! But there was another option.
While searching the Internet for pomade facts and prices I stumbled across some instructions for making pomade at home. I wasn't too sure about the idea until I saw that it contained all of three ingredients and that it took all of about 5 minutes to make. Oh, and the resulting pomade ends up costing around $1.00 per container. It was clearly time for a little DIY fun!
The instructions were very simple: Melt equal amounts of beeswax and coconut oil together in a simple double boiler, add in a few drops of your favorite scented oil, allow to cool and use.
First I needed to get my hands on the ingredients. Amazingly enough, we actually had the coconut oil in our pantry already, a leftover from a past cooking experiment that never happened. I still needed the beeswax and scented oil, however. Time for a trip to the local crafts store.
I was definitely a bit shocked at the cost of beeswax. At least where I shop a pound of bees wax was going for nearly $18. That was going to end up costing around $1 per batch and I hadn't even bought the scented oil yet or factored in the cost of the coconut oil. My fun little bargain experiment was going off the rails. Then I noticed a box of soy wax on the shelf above the beeswax. Only $9 a pound for the soy. I wonder if it can be substituted... Yep! Thank you Internet. The scented oil was another $4, throw in a 40% off coupon, and I was ready to make some bargain pomade at home.
So, here is how it went:

Pomade mise en place
When it comes to projects like this, I go with the mise en place technique: Get everything I'm going to need in one place before getting started. Here you see, going clockwise from the upper left, the scented oil, the soy wax, a two ounce container for the finished pomade, and the coconut oil.
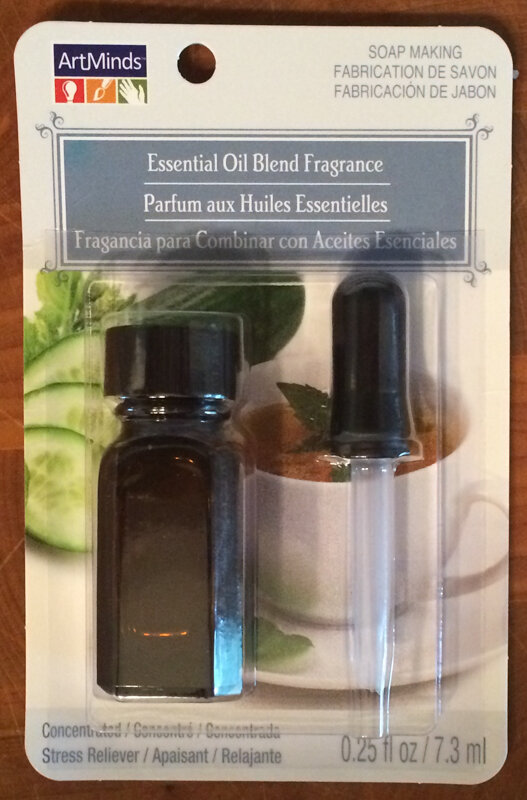
Essential Oil
I had a few choices when it came to the scented oil but, honestly, not a lot of manly scents to chose from at the store I was shopping. This scent from Art Minds is called Green Tea & Cucumber and turned out to be a nice choice. It is strong stuff. A few drops is all I needed for this project. So there is plenty left over for future experiments.
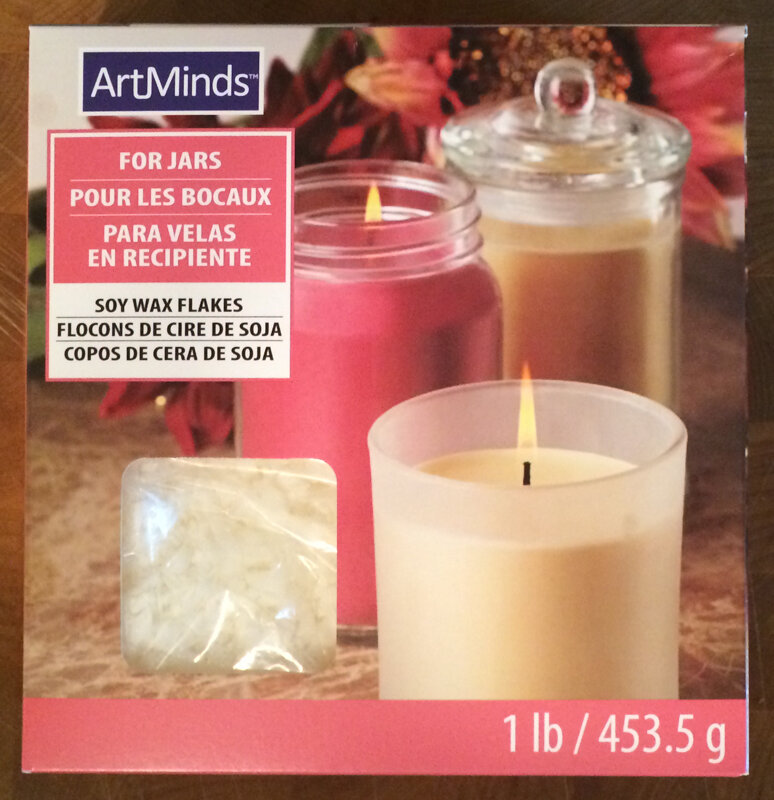
Soy Wax
Here are the soy wax flakes I decided to go with. They are also from Art Minds, as you can see. They are marketed as a product for candle making but the Internet assured me I was in good shape using them for pomade as well. I was planning on putting the stuff in my hair, not eating it, so I was comfortable enough to experiment.

Coconut Oil
And then there's the coconut oil. This 30 ounce jar should only cost you about $6 at your local grocery store. And, since this recipe for pomade ends up using only a few ounces per batch, it will last you a very long time indeed. I was sort of surprised at the texture of the oil. I was expecting a pourable liquid but this jar was more like a loose jelly. Already I was wondering where this was all going to end up.
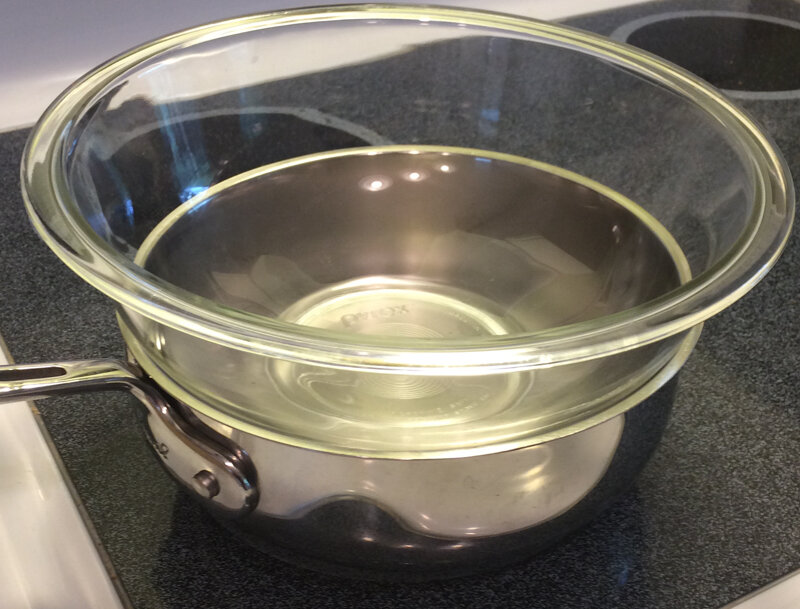
Double Boiler Setup
For a double boiler I went with the tried and true "glass bowl over a simmering pot of water" technique. Nothing fancy and no risk of my experiment costing me some of my cookware in the process. Just be sure if you are using this technique that the water in the pan below does not touch the bottom of the glass bowl. You want to be using the heat from the steam being created and not the water itself.

Flakes in Double Boiler
Here is where I immediately threw the recipe I had out of the window and started to make things up as I went along. The recipe I had found had said that using 1 part of wax to 1 part of oil would yield the desired consistency in the end. The author had suggested 8 teaspoons of wax and 8 teaspoons of oil along with 8 drops of scented oil. It didn't take me long to realize that measuring 8 teaspoons of flakes was not the same as measuring 8 teaspoons of my coconut oil goo. So I decided to use weight instead of dry measurements for measuring the ingredients. In the end what I ended up using was:
3/4 ounce by weight of soy wax flakes
3/4 ounce by weight of coconut oil
3 drops of scented oil
Would it work? At the point I took the picture of the wax flakes in my double boiler above I had no idea. But we were in this for the adventure after all. Onward!

Liquid Pomade
In only two minutes my combination of wax, oil, and scented oil was melted into a nearly clear liquid. Here you can see the finished product poured into the small metal 2 ounce container I happened to have handy. I use these containers all of the time to keep various dried spices fresh in case you were wondering why I had this just laying around. My efforts actually yielded two full containers of this size, or 4 ounces total of pomade.

Finished Pomade
In only about thirty minutes, my new pomade had cooled and set up very nicely! And it smelled nice and fresh thanks to the scented oil. Frankly I couldn't believe it had been this easy. It was time to try it out!

Pomade in Palm
That little bit of product nicely melted out in my palm within just a few seconds. I rubbed my hands together and started to work my new homemade pomade into my sad and dry hair. The moment of truth was here.

The Wet Look
And there we have it. The wet look without going too far if I do say so myself. And I'm please to report that it has kept my hair nicely in place for several hours looking just as good as when I first applied it. I will certainly be using this pomade on a daily basis and easily making more when I run out for just around $1. Success is sweet!
One downside is that I do find it necessary to shampoo at the end of the day when using this pomade, as it can leave me feeling less than fresh as the natural products break down.
Is this the most practical way to get a jar of pomade into your daily hair care program? Not really. But I know this about my pomade:
It is amazingly easy to make once all of the ingredients are rounded up
I know exactly what ingredients are in this pomade
I was able to custom scent it to my taste (lightly)
The finished product is very inexpensive when compared to commercial products
It was fun to make!
And, honestly, it was the fun I was really after. If you decide to give this project a try go ahead and experiment with the proportions a little. More coconut oil will give you a more fluid product and a more wet look. Upping the wax will give you a stiffer product and a little more holding power. Me? I like what I got from my very first batch. Maybe next time I'll give that pricey beeswax a try.