
How To Adapt A Digital Scrapbooking Template
I use templates when making a lot of my digital scrapbook layouts. To me, a template is a tool no different than any other that I use for creating. Often, my finished layout bears little resemblance to the original template. My creations might seem random, but I actually have a pretty standard workflow for how to adapt a digital scrapbooking template.
[Disclosure: Designer Digitals was a former sponsor of one of my other sites a long time ago and I received a couple of the items I used above as part of the work I did for them then. The rest were purchased by me and this post is not sponsored. Sometimes I just link to things because I'm a fan and want to share the love!]
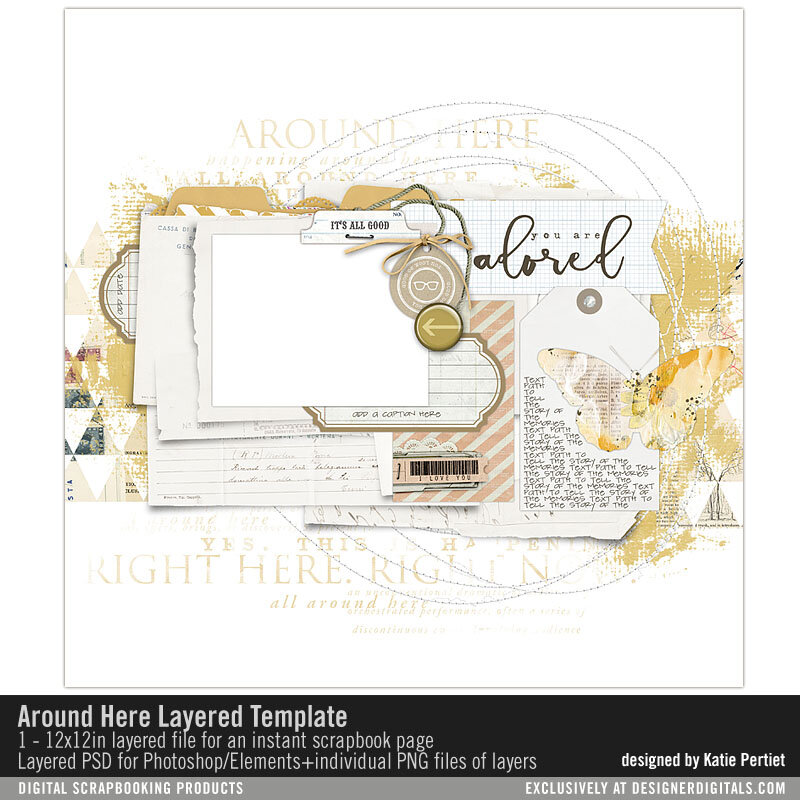
Katie Pertiet Around Here template
For this layout of my arrival at Paris Charles De Gaulle airport in 2017, I only had a single photo. I decided to start with the heavily layered, mixed media style template above by Katie Pertiet of Designer Digitals called Around Here.

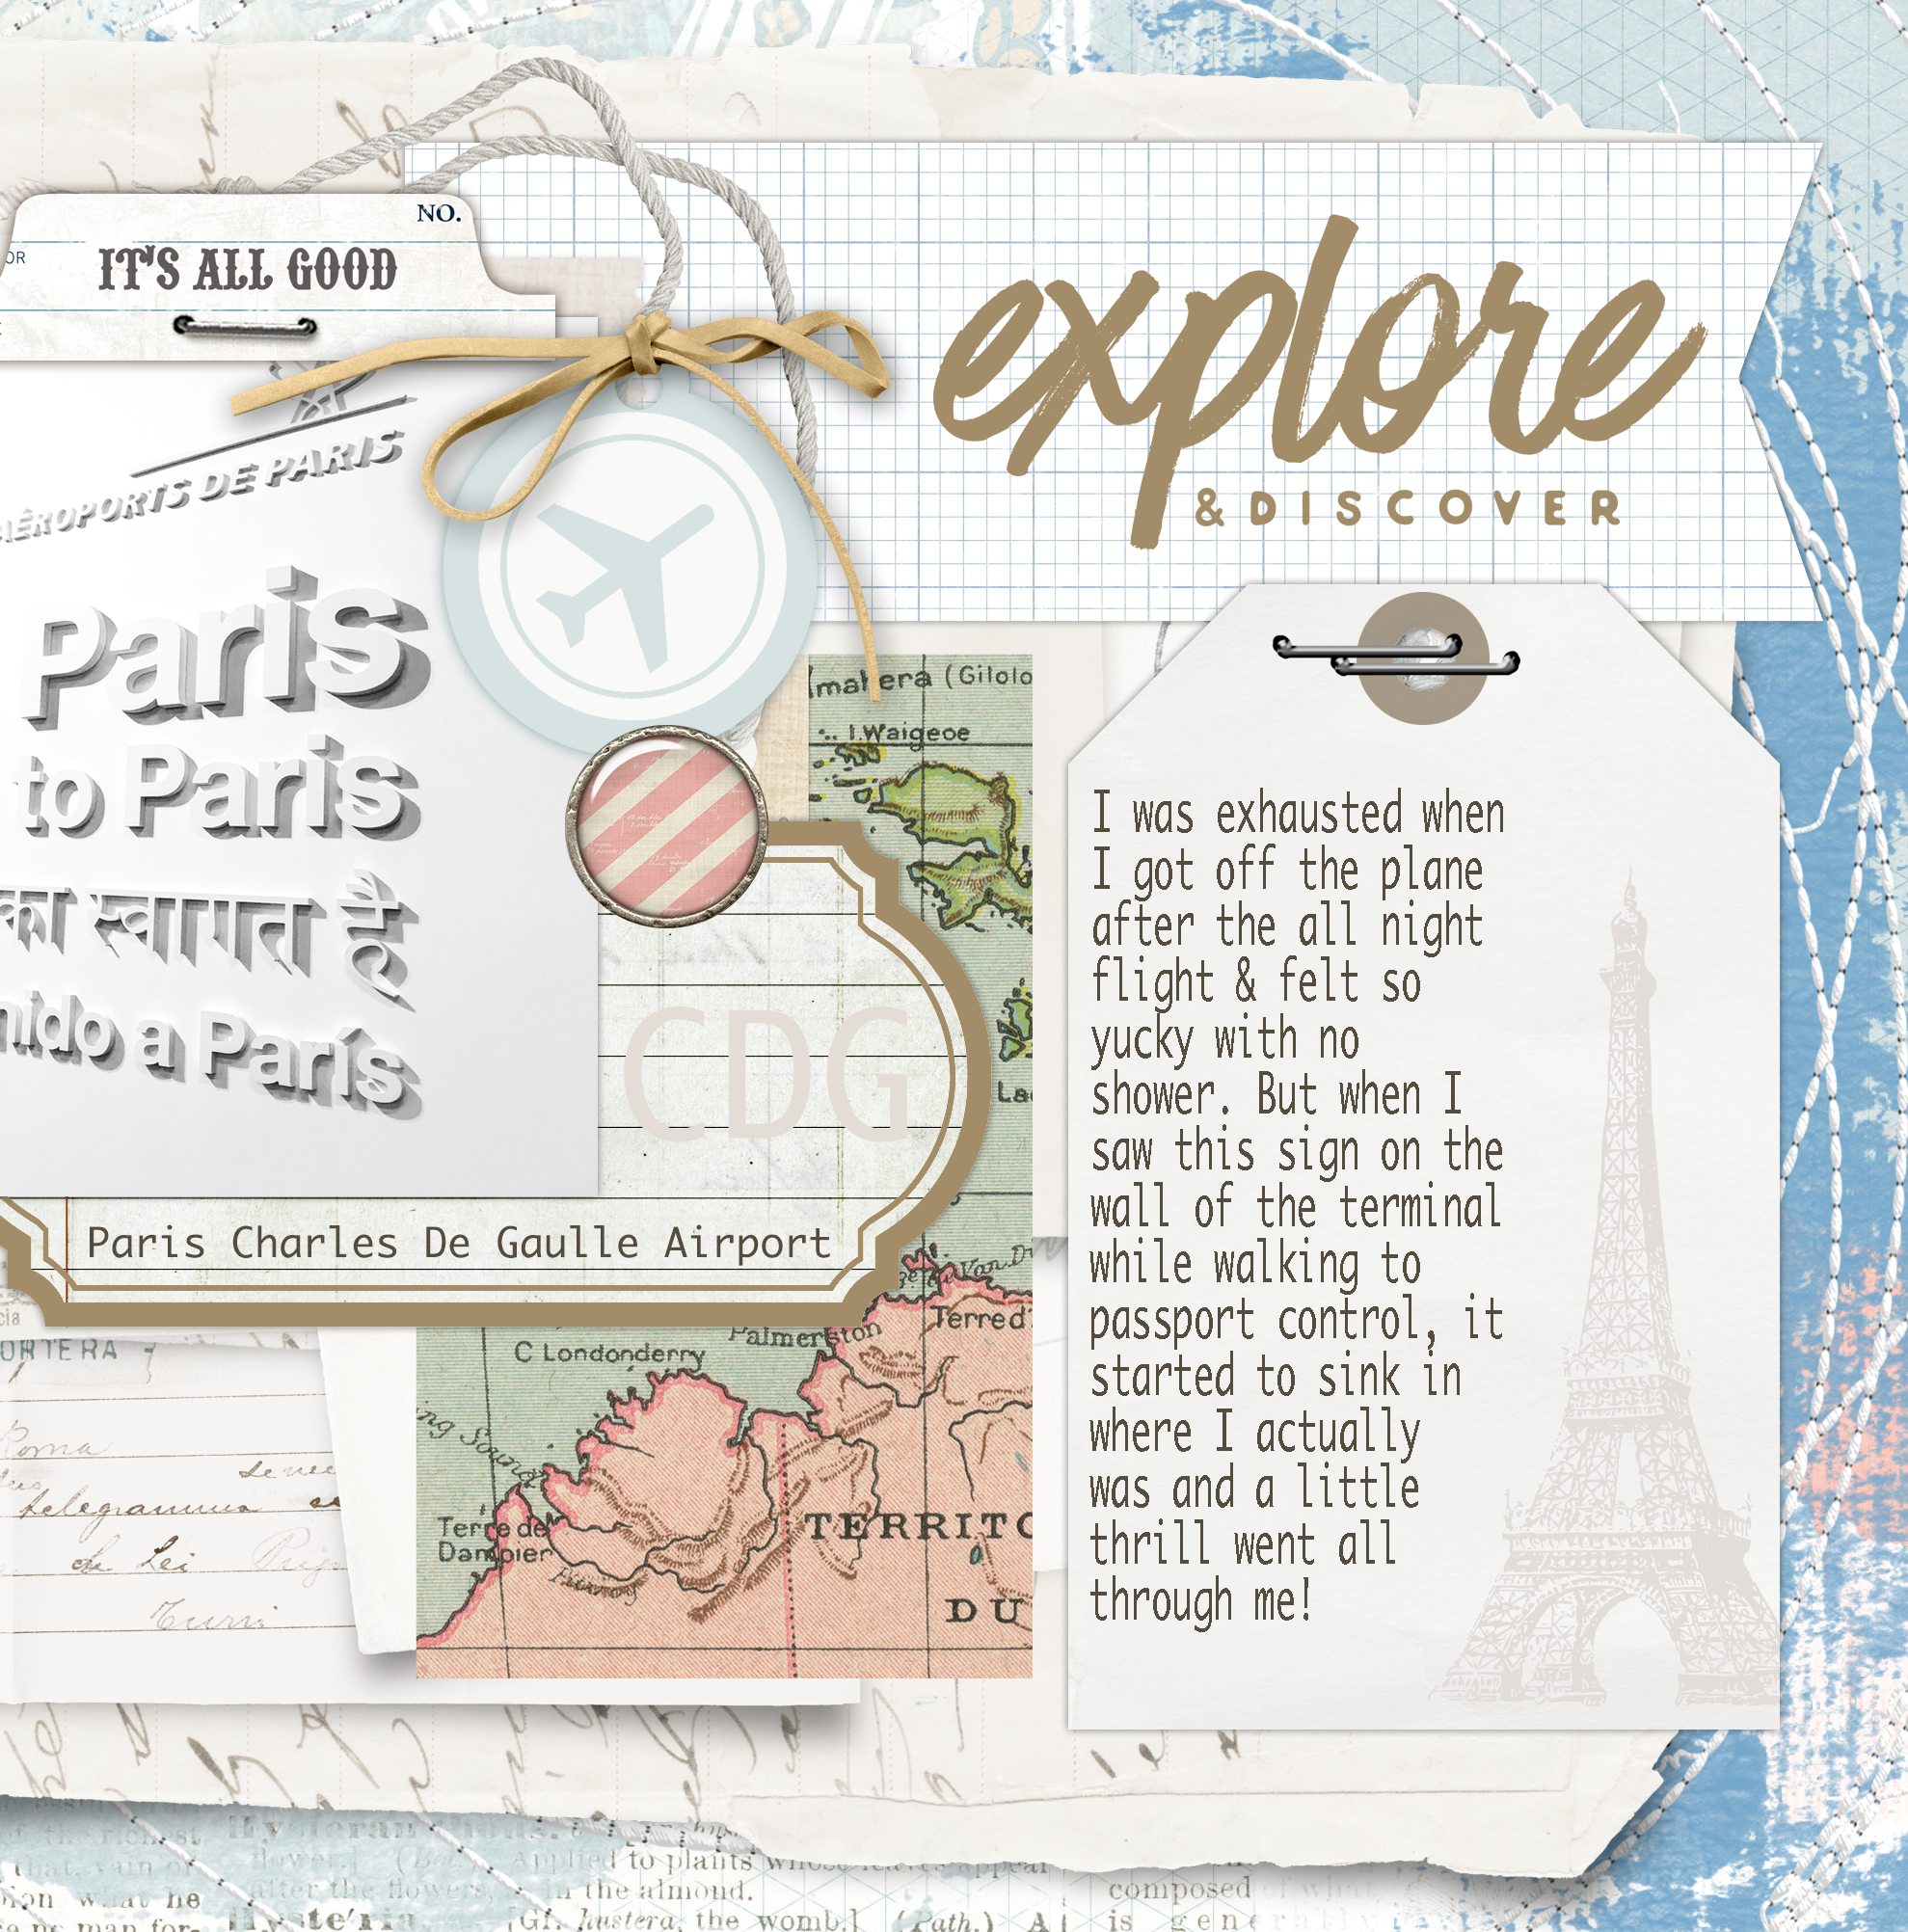
Digital Scrapbooking Paris Charles DeGaulle Airport
From that template start, I got to the above layout. It only took a few simple steps and the addition of a few added elements to turn a golden butterfly template into a blue and pink travel theme!
Supplies Used (all from Designer Digitals):Around Here Layered TemplateCambrianna ARToptions Paper PackFresh Vintage: Albia Washi TapesVacation Memories Brushes and StampsIconic Spots Brushes and Stamps No. 02: TravelerGesso No. 02 Brushes and StampsBloom in Paris Brushes and StampsCrated Maps: Tags No. 01Almost Spring Kit
Here's my process for how to adapt a digital scrapbooking template that got me from the start point to my finished layout:
Add the photo. The first thing that I do after I open the template in my Adobe Photoshop is to place the photos into the template. Everything else I do needs to work with the photos, so I get it in place right away! This stage is also when I adjust the size of central elements in the layout if I need to adjust proportions to make photos fit or highlight it more. (Typically my photos have already been edited in Adobe Lightroom and I open them from there into Photoshop to carry my edits into Photoshop and give me the option to tweak the edits later if needed.)
Select a background paper. Besides the photo, the background paper is usually the most dominant design element in a scrapbook layout. So I typically make it the first design element that I choose. On this layout, I chose a Cambriana ARToptions collection paper for its combination of vintage and mixed media elements that go nicely with the template elements I wanted to keep. The colors were also gentle enough to not overwhelm my monochromatic white photo. This paper did have one thing that didn't quite work for my layout - but I'll show you in a moment how I fixed that up easily.
Hide unwanted elements. Most of the time there is at least one thing on a template that I decide just doesn't work for my specific layout. It might be a themed element that doesn't match my photos (like the butterfly), or an element that just didn't fit my style (like the triangle element). Rather than delete unwanted elements, I usually just hide their visibility, at least in the early stages of making the layout. Hiding rather than deleting makes it easy to change my mind or reference them later for placement and sizing information if I need. When I'm done and am sure I am not going to use those layers, then they can be deleted to clean up the file if I'm feeling extra organized that day.
how to adapt a digital scrapbooking template
Fix items that are remaining. Even some of the design elements that I want to keep in a template design may need adjusting to make the color or theme work. Sometimes that can be done with a color adjustment to the existing layer (like with changing the gold paint to blue). Other times it means finding whole new items, like a tag or brad, to replace ones that were the wrong color or theme.
Replace items that were removed. Often I want to find new elements to replace all or some of the ones that I hid. This happens frequently with title elements, and themed elements especially. For this layout I decided on filling some of the space where the butterfly had been with a muted Eiffel Tower stamp. What better way to set my Paris theme?

Add new items. The final design step is to add new elements to my layout that weren't included in the template design. I added the airport code, CDG, to the large label by the photo on this layout but made it faded out so that it didn't distract from the title graphic. But the big addition that I made was to add some gesso brushes to several areas near the bottom of the background paper. In those spots, there were graphics of plants in the pattern paper that didn't really fit with my theme. I liked the paper overall, so I just used the gesso (which worked great with the mixed media style of the layout) to make them disappear!
Journaling. The very last thing that I do creating a digital scrapbooking layout is to type my journaling into the areas set aside for it in the design. Obviously this can be done earlier in the process when the design elements for journaling are finalized. My preference for some reason is just to journal last, whether I am scrapbooking in paper or digital form. It feels somewhat like putting my final signature on project.Sometimes these steps get juggled a bit, but this basic workflow for how to adapt a digital scrapbooking template helps me efficiently create digital scrapbooking in my own style while using digital templates.

How to adapt a digital scrapbooking template
To see the previous layouts in this album, visit my previous articles:
Do you use digital templates for your digital scrapbooking? Why or why not? Do you have a different process for how to adapt a digital scrapbooking template?